
A practical guide for creating clean, ecommerce-ready apparel images with AI.
Traditional ghost mannequin photography often requires studio lighting, careful styling, and manual Photoshop compositing. With an AI ghost mannequin workflow, you can upload clear apparel photos and create polished product images much faster, with lower production costs and less hands-on editing.
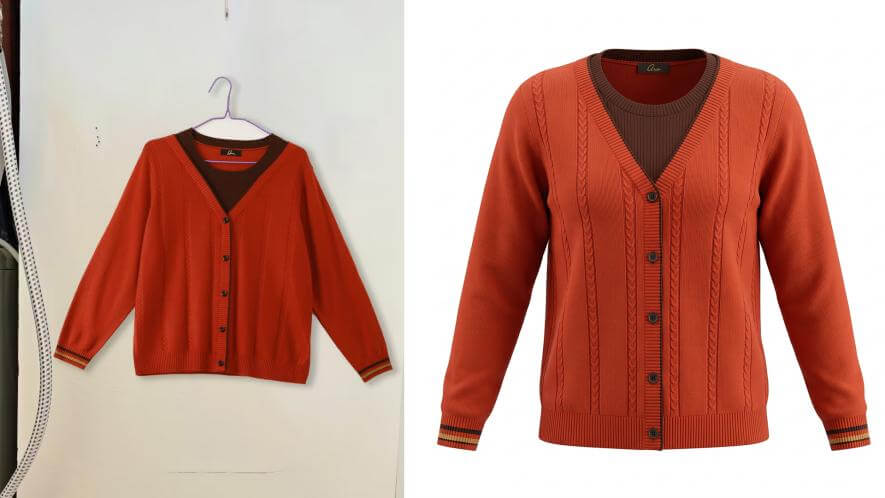
What Is a Ghost Mannequin Photo?
A ghost mannequin photo, sometimes called an invisible mannequin image, is a common apparel product photo style used by online stores. It keeps the shape and structure of a garment as if it were being worn, while removing the mannequin, hanger, or model from the final image.
The result is a clean, professional product image that helps shoppers see the fit, neckline, sleeves, hem, fabric structure, and key details without visual distractions. This style is especially useful for fashion brands, Amazon listings, Shopify stores, marketplace sellers, and direct-to-consumer apparel sites.
In a traditional workflow, ghost mannequin images are created by shooting multiple photos, then manually combining the visible garment with hidden areas such as the inside neckline or back panel in Photoshop. That process can be slow and expensive, especially when you have a large catalog or frequent new product drops.
AI ghost mannequin tools simplify the workflow. Instead of building every image by hand, you start with a clear garment photo, choose the output settings, and let AI generate an ecommerce-ready ghost mannequin result.
Start With a Strong Input Photo
The input photo has a direct impact on the final result. You do not need a full studio setup, but you should make the garment easy for the AI to read. Clear edges, visible construction details, and even lighting will reduce the need to regenerate or retouch the image.
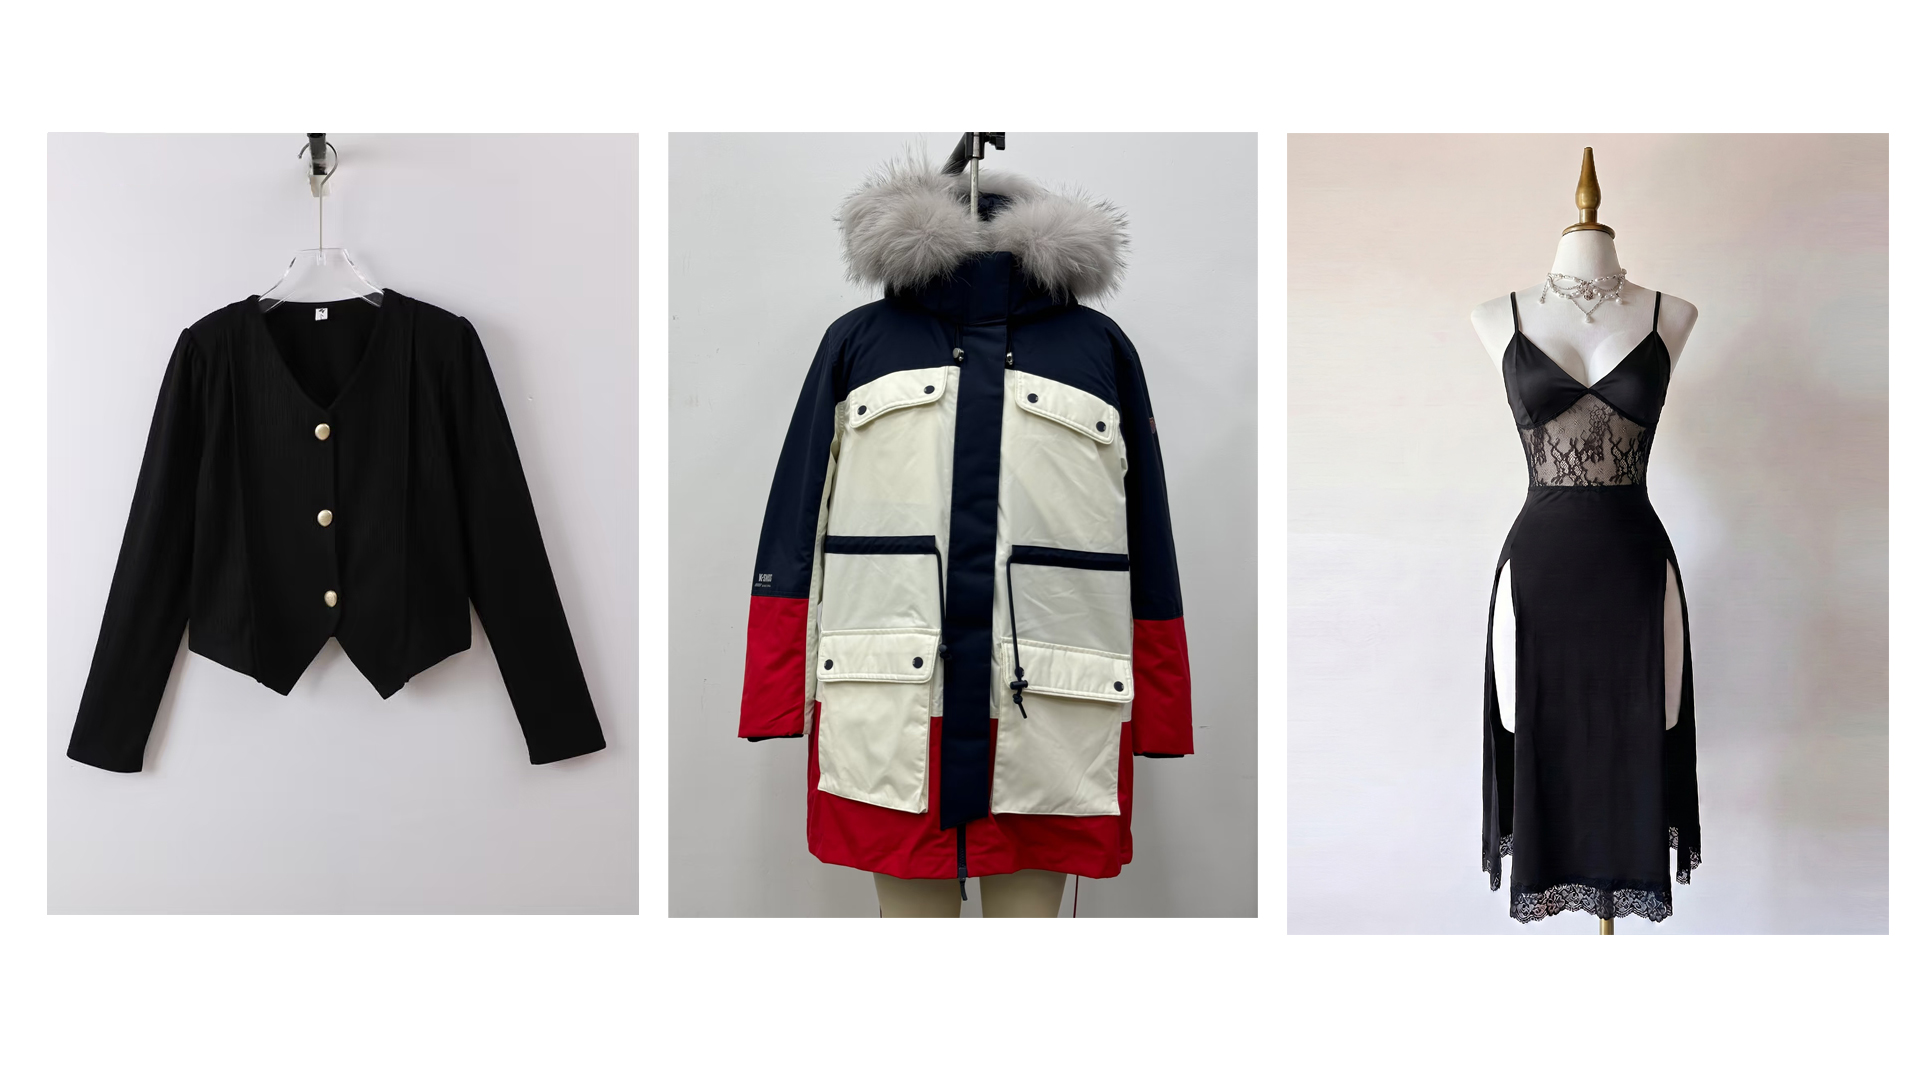
- Best display setup: mannequin photos usually work best, followed by hanger shots, then flat lay images.
- Use a camera when possible. A camera often captures more fabric texture, seams, and edge detail than a quick phone photo.
- Shoot against a white or light neutral background so the garment is easy to separate from the scene.
- Make sure sleeves, collar, hem, shoulder line, and labels are visible when they matter to the product.
- Use soft, even lighting. Avoid harsh shadows, glare, heavy wrinkles, or overexposed areas.
- Do not over-compress the file, and avoid photos where the garment is too small in the frame.
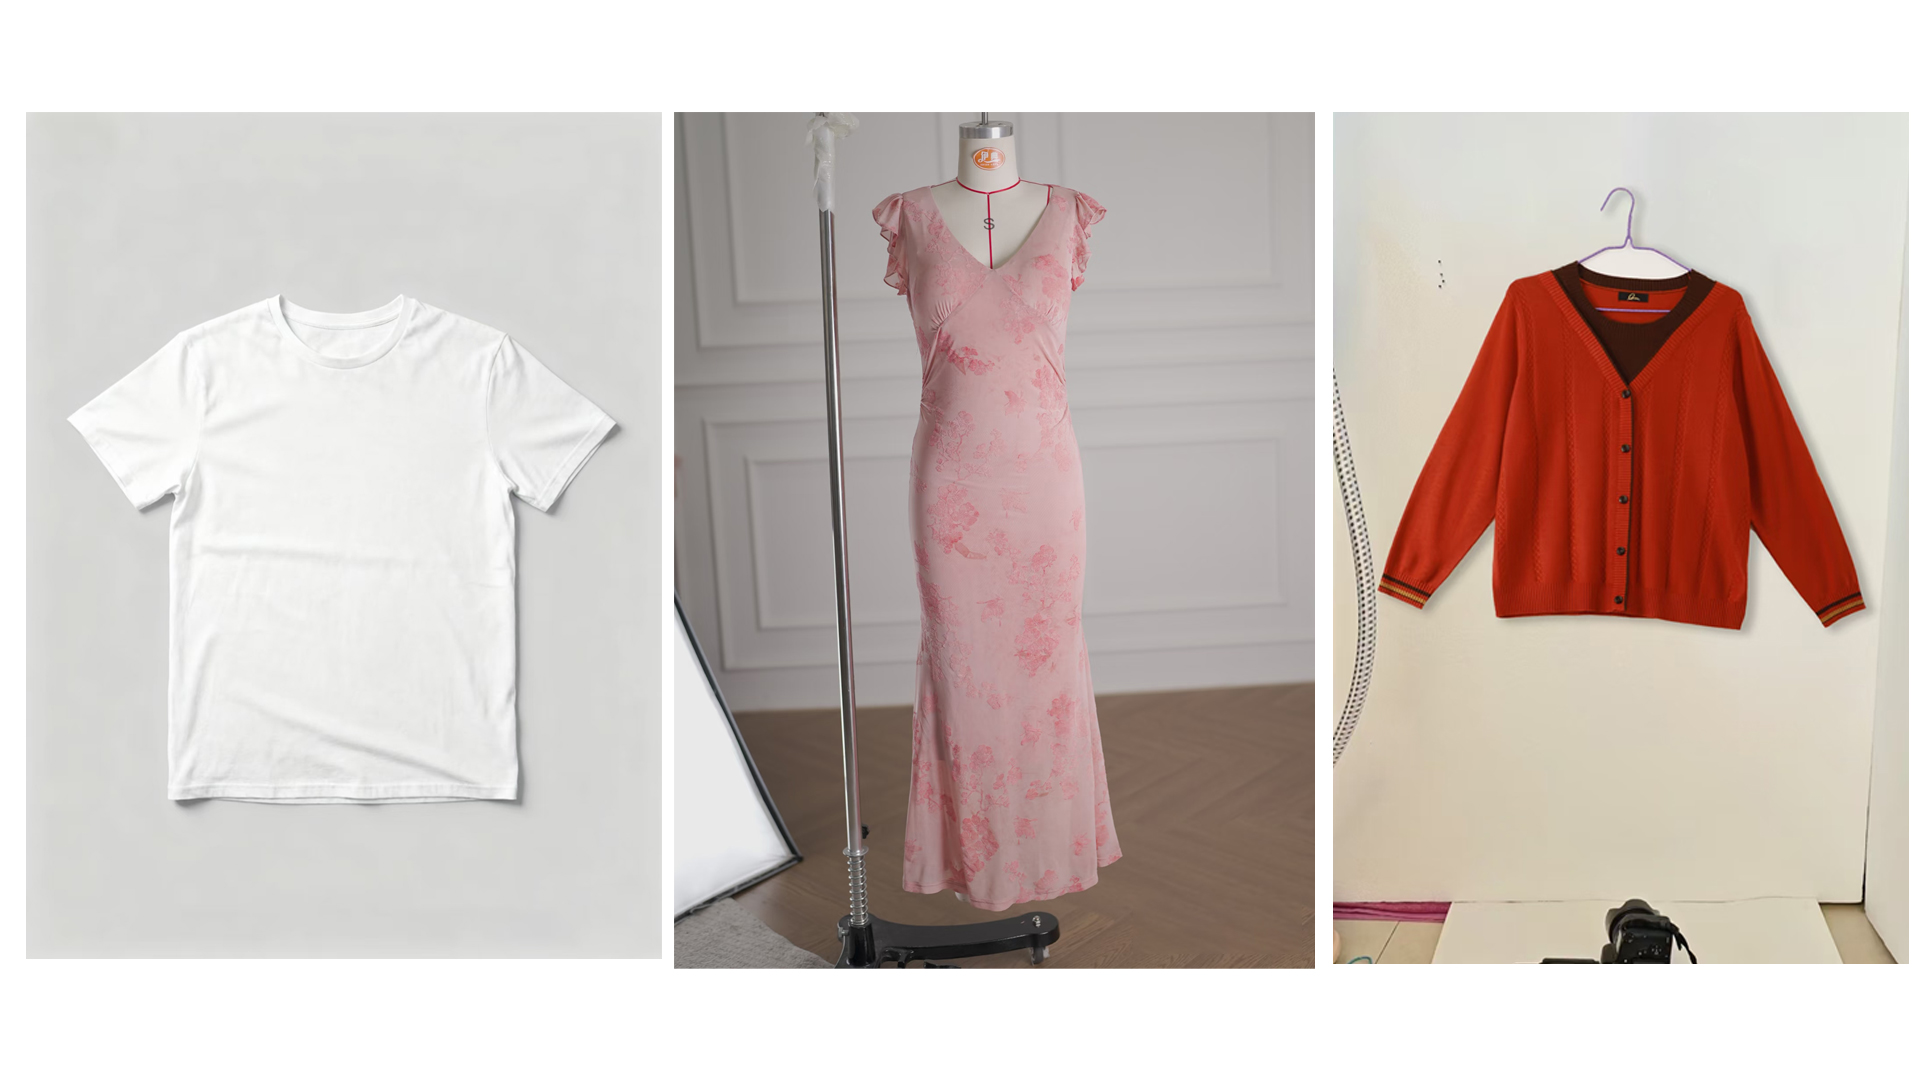
How Many Photos Do You Need?
For simple garments, one front-facing photo is often enough. Basic T-shirts, sweatshirts, shirts, and other straightforward tops usually work well as long as the product is fully visible and important details are not hidden.
If you photograph the item on a mannequin, the mannequin may block the inside collar, brand label, lining, or back detail. In that case, take an extra close-up or detail photo so you have the information available for the product page or for light manual touch-up.
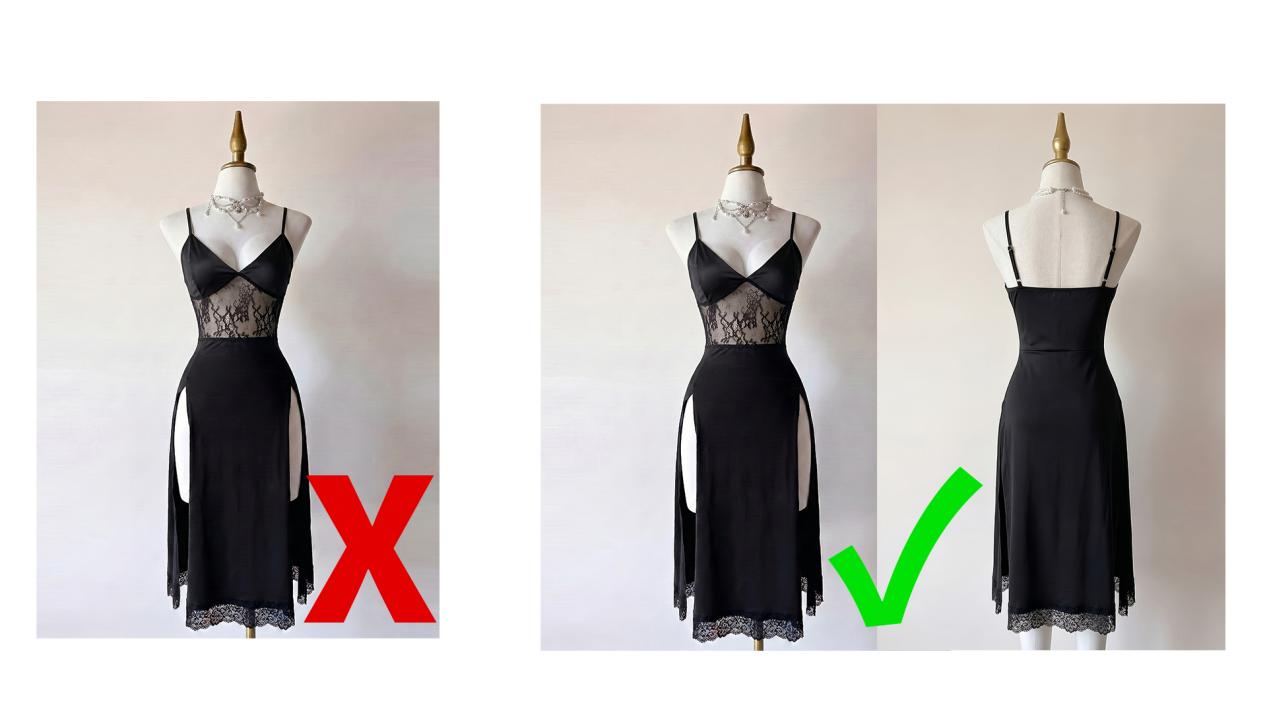
If the front and back of the garment are noticeably different, shoot both sides. This is especially important for products with back graphics, hoods, slits, special tailoring, contrast panels, or details that shoppers need to inspect before buying.
How to Create Ghost Mannequin Photos With AI
- Upload your apparel photo. Start with a clean image where the garment edges, shape, and key details are easy to see.
- Choose your output settings. Select the image ratio, angle, or automatic mode based on where the image will be used, such as a product listing, ad, or social post.
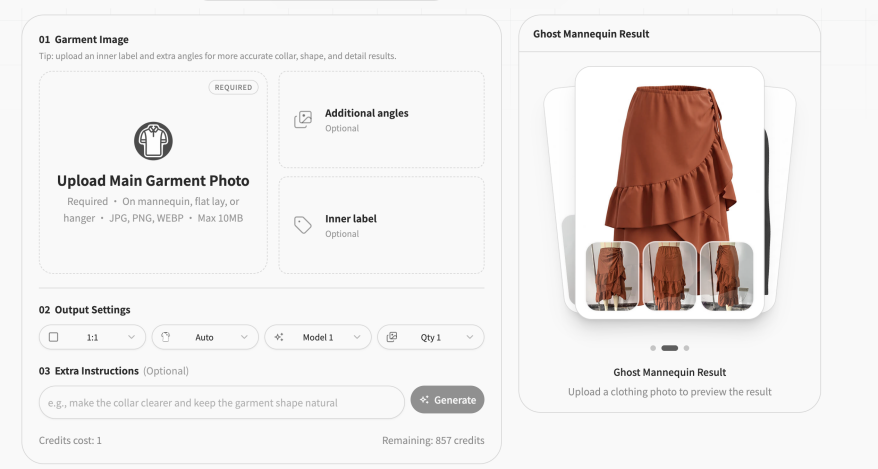
- Generate the image. Most AI ghost mannequin results are ready in about 30 seconds.
- Compare several versions. If the first result is not ideal, generate multiple options and choose the most natural-looking one.
- Use Extra Instructions when needed. For example: "keep the neck label visible," "make the hem look straight," or "preserve the original fabric color."
- Download the final image. Once the shape, color, details, and background look right, use it for your product page, marketplace listing, ads, or social content.
What to Do If the Result Is Not Perfect
If the generated image has rough edges, a distorted sleeve, a missing collar, or a removed label, start by checking the input image. Many output issues come from unclear garment edges, strong shadows, blocked details, or low-resolution photos.
- Upload a sharper image, especially around the neckline, cuffs, sleeves, and hem.
- Generate several versions at once so you can pick the best result instead of relying on a single output.
- Add clear Extra Instructions for details that should be preserved or corrected.
- For small imperfections, finish with light retouching in Photoshop or another editing tool.
AI is powerful, but it is still not perfect at making very precise local edits on command. A practical production workflow is to let AI create the main ghost mannequin image, then use quick manual retouching only for minor cleanup. This is still much faster than building every product image from scratch by hand.
Final Checklist Before Publishing
- The garment color looks close to the original photo, with no obvious color shift.
- The collar, sleeves, hem, and body shape look natural.
- Important details such as labels, graphics, buttons, zippers, and stitching are preserved.
- The background is clean and consistent with your store or marketplace requirements.
- The image ratio works for your sales channel, whether that is Shopify, Amazon, your own website, paid ads, or social media.
Bottom Line
The key to making a strong ghost mannequin photo is not just clicking Generate. It starts with a clear, well-lit input image that gives the AI enough information to understand the garment. When the original photo is clean, complete, and easy to read, AI can produce professional apparel product images much faster.
Compared with traditional studio photography and manual Photoshop compositing, an AI ghost mannequin workflow is a practical way to speed up product launches, reduce image production costs, and handle batch SKU work more efficiently. For more complex garments, use multiple angles, generate several options, and apply light retouching where needed.